Knowing when to Dig
By Larry Goldie
I like to start a day of touring with an innocent sounding question; “Anyone know what the hazard is rated today?” This question is a very effective way to begin a conversation with your touring partners about the current avalanche conditions. I like to follow it up with something like; “Considerable, eh? What’s our main concern?” Now, with a discussion about the current avalanche conditions underway, you can move on to discuss the plans for the day and how to maximize your skiing and minimize your exposure to hazard.
Decision making in the backcountry is seldom black and white. Occasionally, there is a widespread natural avalanche cycle taking place and the choices are more obvious. Every now and then, there are periods when things are really stable and everything is good to go (ie: several days after the previously mentioned natural cycle). In reality, however, most days fall into a grey area in which the skiing is good, but there is an avalanche concern that needs to be considered. These grey days make up the bulk of the winter and are the reason for the need to have good terrain and snow assessment skills.
“The snowpack is the problem, and the terrain is the solution,” is an old guide’s adage and it informs a lot of backcountry decision-making. But what about the times when you are unsure how much of a problem the snowpack poses? There are situations in which conducting a thorough snow assessment is the logical step: traveling to an unfamiliar area like a backcountry hut in British Columbia, or when contemplating a day of sidecountry touring near the ski hill during your family vacation to Utah. For me, it always comes back to the mathematical expression known as Goldie’s Axiom, which states: less digging = more skiing. With this idea in mind, let’s look at ways to target snow assessment for maximum efficiency and information return.
The simplest way to begin narrowing your focus and building your knowledge of any snowpack is with the regional forecast center’s avalanche report. Since these guys are already getting paid to dig pits and collect data, their reports are the natural place to begin gathering information. Currently, many avalanche centers not only offer a hazard rating, but they also identify what they see as the primary concerns or threats. A modern avalanche bulletin might say that the primary concern is the recent 30 centimeters of storm snow that fell over the last 48 hours. The secondary concern might be a sporadic surface hoar that was buried three weeks ago and is now down 80cm, and while isolated, it is still capable of producing larger avalanches.
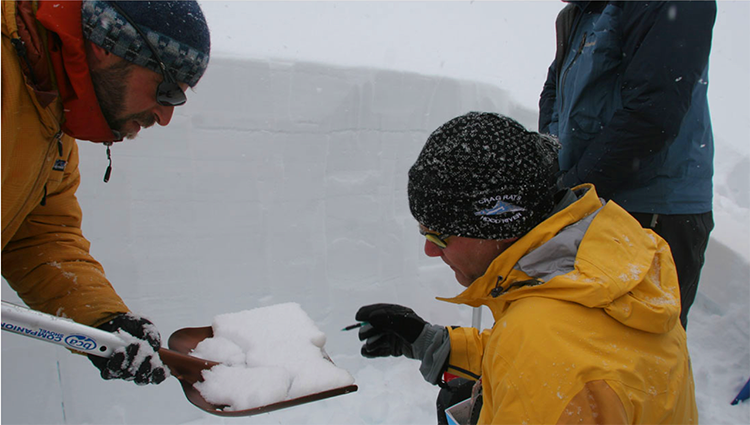
Armed with this information, you can decide where and how to further assess the snowpack. For example, if the threat is storm slabs, these are likely to be found on all aspects and at all elevations (potentially more prevalent at the higher elevations). In this situation, your most important observations will include the depth of the new snow as you break trail, the layering of the new snow that you can feel with your ski pole, and being especially observant of any red flags in the form of recent avalanches. Valuable tests during your tour will include hand shears, shovel tilt tests and ski cutting small test slopes. Due to spatial variability, numerous quick tests over a wide area can provide a better overall picture than detailed testing in a single location.
The persistent slab issue (buried surface hoar) is a bit more difficult to evaluate. Here you need to find out three things: Is the buried surface hoar layer present, can it be initiated, and will it propagate? Identifying the presence of the layer can be tricky, but can be done by examining a standard column profile, which is also the first step toward performing a more detailed stability test. One of the best tests for showing a layer’s likelihood for failure initiation is the compression test. As one of the simplest and quickest among the formal bonding tests, the compression test does a great job of identifying weak layers and suggesting if they are likely to initiate a failure within the snowpack. What the compression test doesn’t do as well is indicate whether the failure is likely to propagate into an avalanche. This level of information is in the realm of the large column tests. Now, if you are like me, your internal calculator is saying large column test = less skiing (a variation of Goldie’s Axiom). And while a large column test, like a Rutschblock, is a fairly time consuming test, there are a couple of newer large column tests that can yield some great information about the likelihood of fracture propagation that are relatively quick to perform.
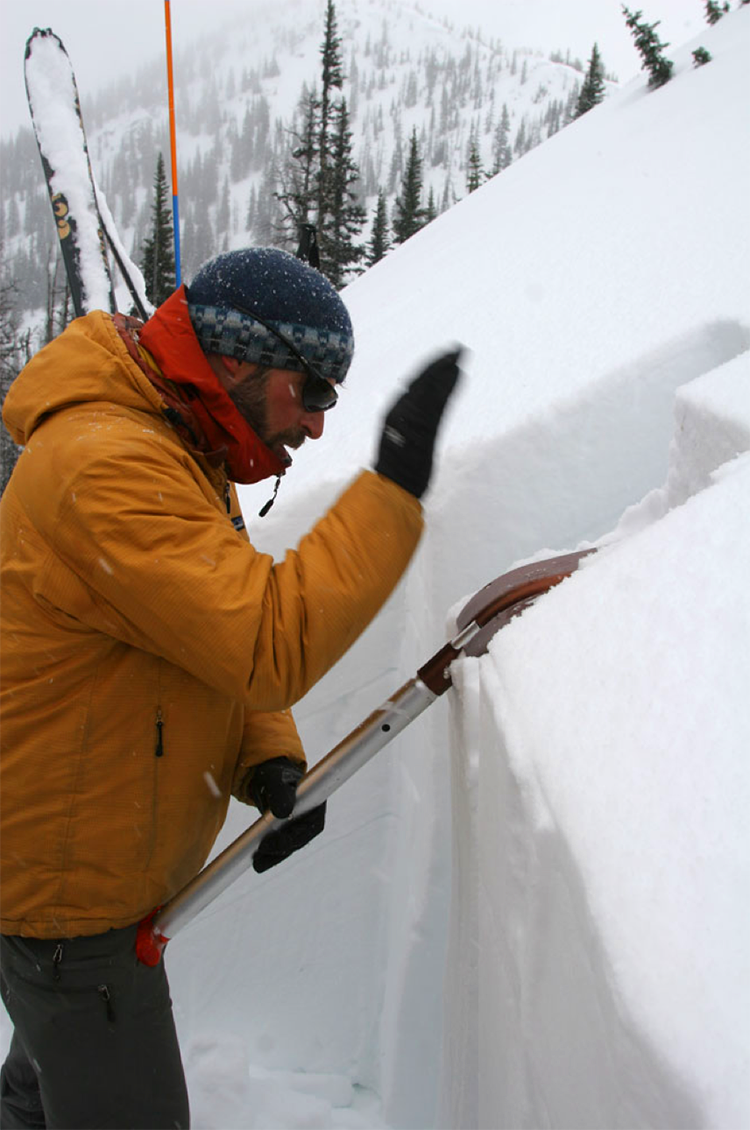
The first of these large column tests is the Extended Column Test (ECT). The ECT is a great follow up to the compression test and can often be conducted with minimal extra digging. The ECT uses a column similar to the compression test, but requires that it be 30cm deep x 90cm wide rather than simply 30cm x 30cm. Once you have identified the weak layer in question, the ECT lets you see if the failure will propagate across the extended column by tapping the column at one end like in a compression test. A positive result (failure propagates) equates to a higher likelihood of an avalanche occurring. Recent research on this test has shown that results are most accurate when the weak layer is less than 70cm deep.
The propagation saw test (PST) is a second new large column test that is gaining traction among professionals for testing deeper persistent weak layers (PWL’s). The PST requires isolating a column of snow 30cm wide x 100cm upslope. If the weak layer is deeper than a meter, the length upslope is equal to the depth of the weak layer. Rather than subjecting the snow above to any kind of compression or shear force, a saw is dragged upslope directly through the weak layer, initiating failure right at the layer. Avalanche propagation is only likely if the failure initiates when the saw is moved 50% or less than the upslope length of the column and continues uninterrupted to the end of the column.
Both of these tests are designed for advanced evaluation. The best place to learn more about these large column tests is in an Canadian Avalanche Association or Avalanche AIARE (American Institute Avalanche Research and Education) avalanche course.
Since these snowpack tests do require you to stop and dig, it’s important to use the most appropriate test for the avalanche concern with which you are dealing. In many situations, simply observing all of the clues available around you is just as valuable as pulling out your shovel. For example, if the primary concern is wind slab, knowing that they tend to form from the wind redistributing snow, breaking up and packing it together more densely than the snow upon which it lays is important. Simple observations help here: Which way was the wind blowing? Is there still snow in the trees? Does the snow surface change in appearance? Does the depth of the uptrack vary throughout the terrain? Does the snow feel hollow? Can you feel density changes with your pole as you break trail? These observations can be made across a wide area and they tell you a lot about the depth and distribution of a windslab layer without ever stopping to dig.
Throughout the process of evaluating snow stability, it’s important to keep the big picture in mind. Forecasts from the local avalanche center combined with astute targeted field observations and some carefully chosen snowpack tests help to build an overall view of current conditions. In the end, however, assessing snow stability is extremely complex.
When doubts about stability remain, remember that the terrain is the ultimate solution. For me, that means following a simple formula: When I am unsure about the stability or when I am sure that the stability is poor, my solution is the same: I choose safer terrain. By utilizing simple formulas such as this, you can maximize your skiing, stop and dig no more than is necessary, all the while keeping safety at the forefront – math doesn’t get much cleaner than that!
Larry Goldie is an IFMGA certified guide and owner of North Cascade Mountain Guides.
Source: offpistemag.com





Comments